

It took me a few weeks to come up with this recipe that I have found is absolutely foolproof for a beautiful sourdough loaf. Its minimally hands-on, very forgiving and overall just therapeutic to make.
This loaf, as with most sourdough starter containing bakes, is a labor of love that takes time, so please plan out your bakes accordingly.
Below, you’ll find my master recipe for all base sourdough loafs and the core recipe behind all of my inclusion loafs. I am very proud of this one because I have been having it tested at different altitudes and humidity levels throughout the U.S. and everyone has checked in perfectly. This truly is a loaf recipe that works in every climate.
Here’s to hoping it works for you too.
INGREDIENTS :
- 500 g (grams) Flour (Bread or All-Purpose)
- 350 g warm Water (85°F – 110°F)
- 100 g active Sourdough Starter
- 11 g Sea Salt
STEPS :
- Add your warm water and active sourdough starter into a bowl. Using a whisk, stir the two together to fully incorporate. Add flour and salt and give it a rough stir to get everything mixed up, but you do not need to knead the dough. Cover with a lid or towel and let rest 30-60 minutes.
- Begin your stretch and folds process. This part will take you an accumulated 2 hours, although most of it I hands off time that you will spend waiting, so plan the start of your doughs accordingly. Lift one edge, any edge, of your shaggy dough and pull it upward roughly about 12″ and then press it into itself, in the center. Move on and repeat on the edge next to the one you just pulled up. Continue along the entire bowl until you do 2 full circles around. This completes your first stretch and fold. Cover with a lid or towel and let rest 30 minutes.
- Lift one edge, any edge, of your dough and pull it upward roughly about 12″ and then press it into itself, in the center. Repeat on the edge next to the one you just pulled up. Continue this along the entire bowl until you do 2 full circles around. This completes your second stretch and fold. Cover with a lid or towel and let rest 30 minutes.
- Repeat the steps above to complete your third stretch and fold, then follow with allowing your covered dough to rest for 30 minutes.
- Repeat the steps above to complete your fourth and final stretch and fold, then cover with a lid or Saran Wrap and allow your dough to do its first rise/ferment. I recommend leaving your dough, covered, to do its first rise/ferment, on your countertop for 6-12 hours. Room temperature.
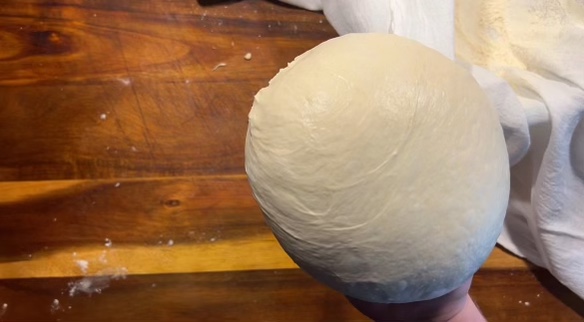
- After your first rise/ferment that took 6-12 hours of time to rise in a room temp setting, your dough should look expanded. Maybe not doubled, but noticeably bigger/wider. It is now time to shape your dough. Roll your dough out of the bowl. Begin rolling the dough in on itself by using the sides of your hands to tuck it under itself. You can also use the folding approach where you stretch the dough out into a rough rectangle, fold it in on itself like you’d be folding a letter to fit into an envelope, and then roll it all up into a roll, pinch the edges closed and let rest for a few minutes while you do the next step.
- Prep a bowl by laying a clean towel down and sprinkle it generously inside with flour so that your dough doesn’t stick to the towel. Lift your dough and put your dough into your prepped floured towel with the smooth face down, touching the sprinkled flour. Use the towel edges to cover up the rest of the dough (the not so pretty side). Put into some sort of plastic bag and tie it up so that your dough keeps its moisture content. Put it inside of the fridge for its second rise/ferment. Allow it to rise/ferment in the fridge for 6-48 hours. I have tested out the different tastes of different fermentation times and I have found that for every day loafs, I prefer allowing the second ferment to be around 12-18 hours. If I want a more sour taste to my bread, I like going up to 36 hours of a second ferment. This all heavily depends on what flavor you’re looking for and how much time you have to make this bread. Play around with it and see what you prefer.
- Preheat oven to 450°F. Preheat your dutch ovens with lids inside the oven at this time too.
- After your second rise/ferment, transfer your dough from the toweled bowl to a piece of parchment paper you’ll be baking this loaf on. I prefer to do this by putting the parchment piece on the dough, then putting a plate over that parchment paper and flipping the bowl over. Then I lift the bowl, remove the towel carefully by peeling it off the smooth dough face and I’m left with a smooth dough ball on parchment paper on a plate.
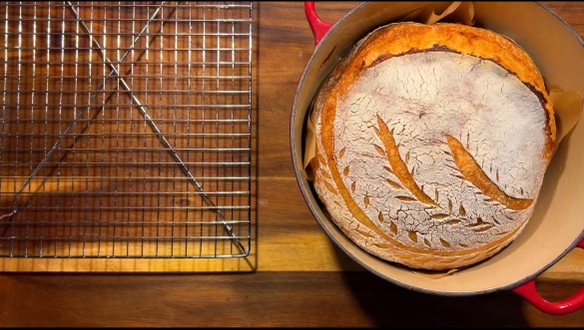
- Sprinkle some flour on top of the dough ball and use your hand to cover the entire face smoothly. Score your dough to allow steam to escape while it is baking. Transfer to your hot dutch oven and bake covered for 30 minutes at 450°F.
- After the initial 30 minute bake time, remove your dutch oven cover/lid and turn your oven down to 400°F and allow your bread to continue baking for 15-25 minutes, or until the dough is golden brown. This takes 15 minutes for me. This may vary by oven.
- Remove from the oven and allow at least 1 hour to cool down before slicing. Enjoy!

This is what an active sourdough starter should look like. I prefer to use them after their “peak”, just when its beginning to fall again because that means the starter is starting to get hungry.
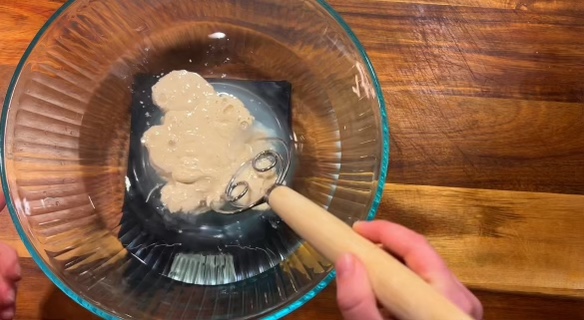
Combine your warm water and active start and mix thoroughly.
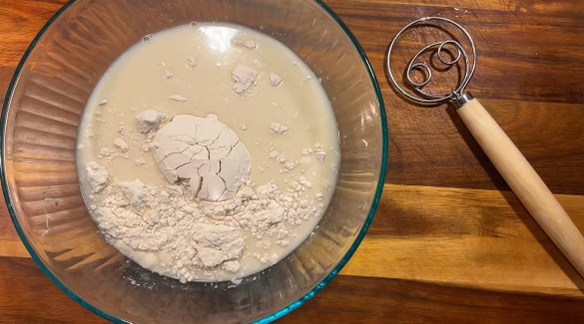
Add flour and salt to your starter and water mixture and mix everything together roughly. Your dough will be very sticky and shaggy. Don’t worry.

Once mixed, cover with a lid or Saran Wrap or a towel and let the dough rest for 30-60 minutes.
Once your dough has rested, uncover it and begin the first of four stretch and folds. Do this every 30 minutes. This will take 2 hours to complete if you do 4 of them.

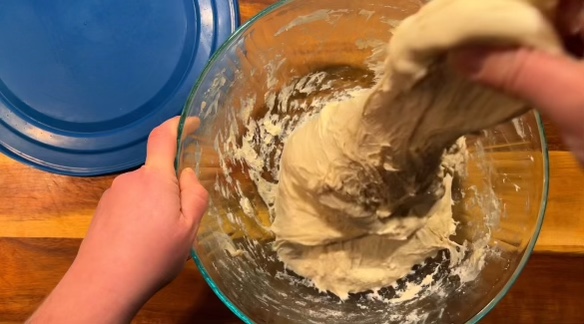
Do the stretch and folds 4 times in total. I do this by grabbing an edge of the dough and lifting it up around 12″ and then lowering it back down on itself (shown in next picture), in the middle, and moving clockwise in a circle, twice, and repeating this process with every edge of the dough. So lift it up like in the photo above.
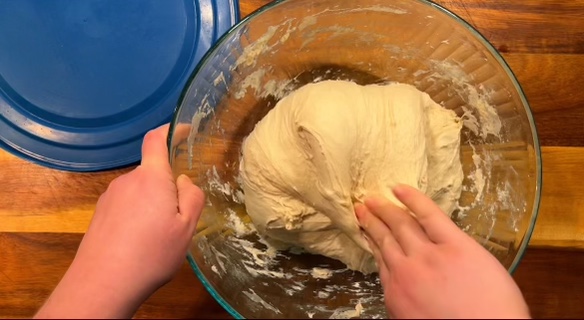
Fold it back on itself, like in the photo above. Then proceed to the next edge. This is how a proper stretch and fold should look. With each cycle of stretch and folds, you’ll notice many differences in the consistency of your dough. This is your gluten relaxing. After each 2 full circle spins, you will cover your dough with a lid or towel and allow it to rest for 30 minutes in between stretch and folds.
After your fourth stretch and fold, you will cover your dough with a lid or Saran Wrap and allow for the first rise/ferment to occur, on your countertop, for 6-12 hours.
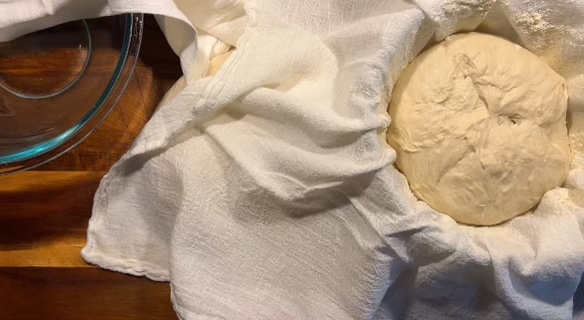
Once that is done, you will shape your dough into a circle, prep a bowl laden with a towel that is sprinkled with flour and lay your dough ball, smooth face down touching the flour in the towel, and close it up with the towel flaps. Put the bowl in a plastic bag to retain moisture and put into the fridge for your second rise/ferment. This second rise/ferment will take anywhere from 6-48 hours. I prefer my breads to have a 12-18 hour second rise/ferment before baking.
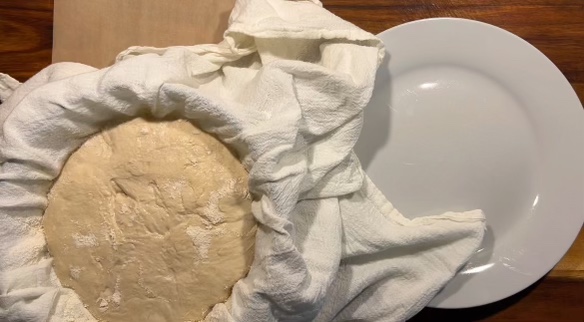
After your second rise/ferment, you will transfer your dough from the towel bowl to a piece of parchment paper you will be baking it on. Preheat your ovens and dutch ovens/cooking apparatuses, during this time, to 450° F.
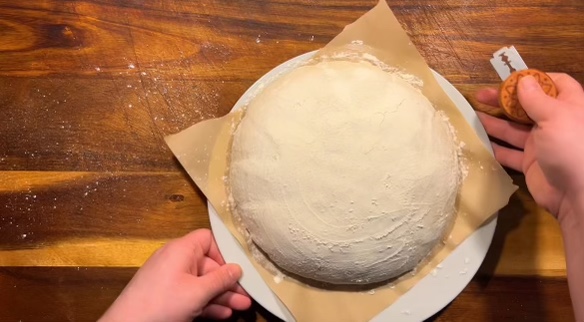
Sprinkle flour to the top of your dough and score your dough. This means you will create a cut or a series of cuts through the dough top to allow steam to escape while cooking so that the entire dough will cook through and not be undercooked or gummy inside.
Bake covered at 450° F for 30 minutes. Then, remove the lid, turn your oven temp down to 400° F and bake for an additional 15-25 minutes or until the top turns golden brown in color. This typically takes 15 minutes for my oven.
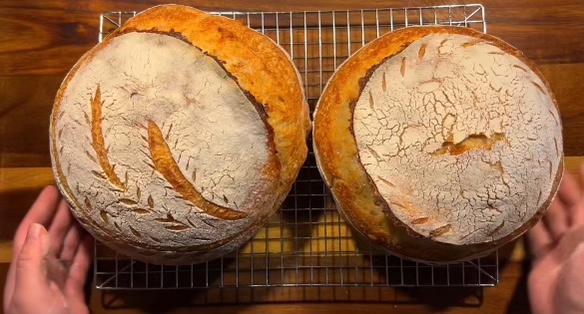
Remove from the dutch ovens and allow to rest and cool down for an hour before slicing.
Enjoy!
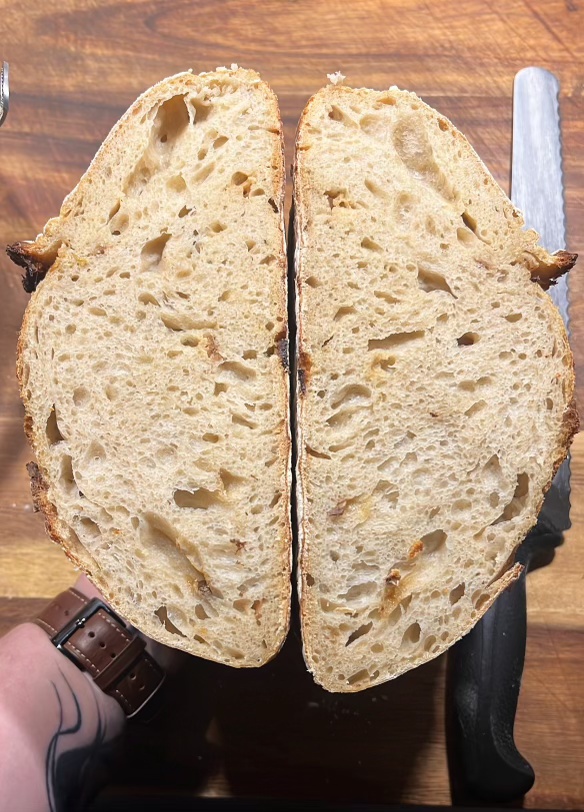
This bread should be eaten within 3-4 days after being baked, however, if you still have some left, slice it up and freeze it! it freezes and reheats in the toaster beautifully!
LINKS TO PRODUCTS I RECOMMEND FOR THIS RECIPE :
* If you purchase anything through any of the links I provide in my posts, I may receive some compensation, at absolutely NO cost to you! Thank you for helping me do what I love, and that is teaching you all to cook.*
Danish Whisk – https://amzn.to/3WhmeQW
Glass Bowl with Lid – https://amzn.to/3WhmrDI
Long Silicone Spatula – https://amzn.to/4haEGmt
Le Creuset Dutch Oven – https://amzn.to/3PuGWt1
Parchment Paper – https://amzn.to/3Py5Bgg
Bread Scoring Lame – https://amzn.to/40t43u1
Cooling Rack – https://amzn.to/40uEOaS
The BEST Bread Knife – https://amzn.to/42amzbR

Leave a comment